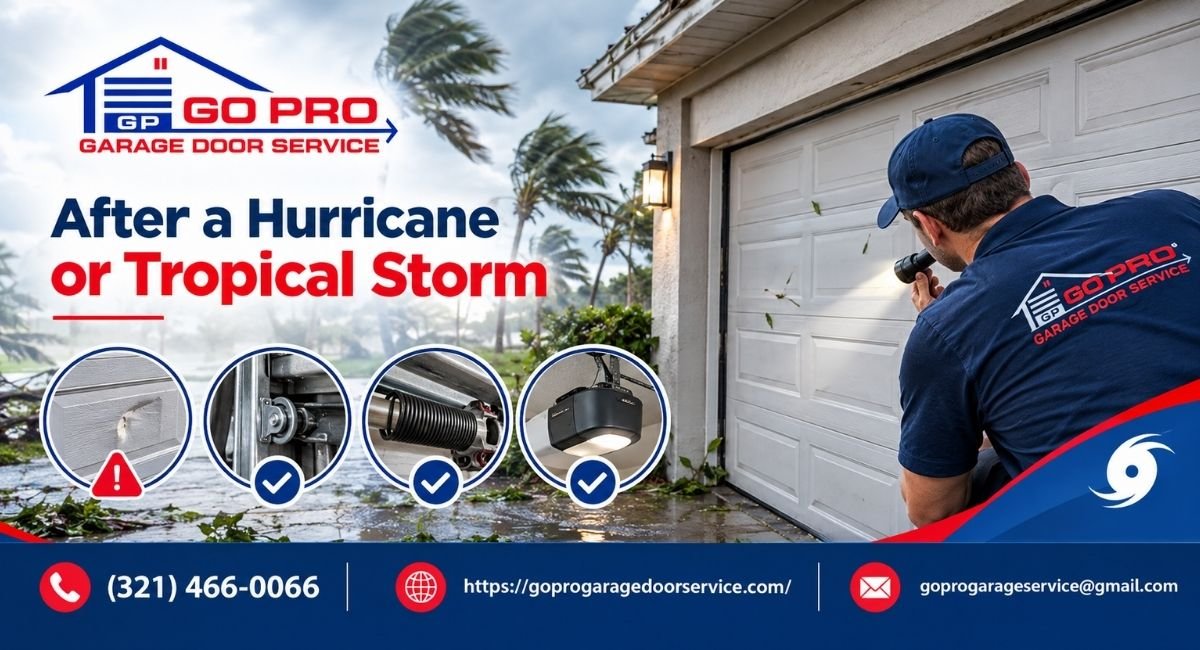
You step outside after a Florida storm. Branches cover the yard. Your garage door looks fine at first glance. Then you spot a gap along the bottom, a panel that bows inward, or a track that no longer runs straight.
The garage door is often the weakest opening in a house. It is wide, light, and it faces the wind head on. Strong gusts can bend panels, twist tracks, and pull hardware loose. A door that made it through the storm can still be unsafe to use.
A garage door storm damage inspection takes about 30 minutes. It needs no special tools. It does need a clear order of checks and a little patience. This guide gives you that order. You will go from safety steps to panels, seals, tracks, springs, cables, and the opener.
You will also see how wind-load ratings and the Florida Building Code shape your repair and replacement choices. If the damage goes beyond a simple fix, you will know how to weigh repair against replacement. And you will know what to record before you call your insurance company.
The steps are the same whether you live in Orlando, Kissimmee, Sanford, or anywhere else in Central Florida. Start with safety. Then work through the door one part at a time.
Why Storm Damage to a Garage Door Is Easy to Miss
Wind damage rarely looks dramatic. A door can stay on its track and still carry hidden harm. Small cracks, loose fasteners, and slight bends in the tracks often show up only when you run the door.
Knowing how a storm attacks the door helps you know where to look.
The door is a large, flat target
A standard two-car door is 16 feet wide and 7 feet tall. That is 112 square feet of surface facing the wind. Gusts push on the outside of the door. Air can also leak in around the edges and push from the inside. The panels flex back and forth, and each cycle puts stress on hinges, struts, and track brackets.
Damage builds in stages
Wind seldom breaks everything at once. The bottom seal may lift first. Panels then flex and the horizontal struts loosen. Later, a track bends and the door slips out of alignment. A storm that lasts for hours gives each of these small stresses time to add up.
Water adds a second problem
Tropical storms bring rain, and wind drives it sideways. Water that gets past worn weather seals can reach the opener, the safety sensors, and the wiring. Metal parts start to rust. Wood framing around the door swells and can rot. Some of these effects take days or weeks to show.
A quick symptom guide
Use this table as a first filter. The sections below explain each check in detail.
| What you see | Likely cause | First action |
|---|---|---|
| Panel bows inward or has a crease | Wind pressure or flying debris | Stop using the door and photograph the panel |
| Gap along the top or sides of a closed door | Bent track or shifted jamb | Check track alignment, then call a technician |
| Door hangs crooked or lopsided | Broken cable or loss of spring tension | Do not touch cables or springs. Call a pro |
| Opener hums but the door does not move | Door off track, or motor damage from water | Cut power to the opener and inspect the door |
| Light shows under a closed door | Torn or flattened bottom seal | Replace the seal after the full inspection |
| Rust or water stains on opener or sensors | Water intrusion | Keep power off and have the unit checked |
For a wider list of warning signs, read our guide to garage door repair signs. It covers problems that show up in everyday use, not only after storms.
Safety Steps Before You Touch the Door
A storm-damaged door can fall, spring back, or shock you. Slow down and work through these points first.
- Check overhead and underfoot. Look for downed power lines and standing water before you walk toward the garage. Treat every line as live.
- Keep power off if water reached the garage. If water touched outlets, the opener, or the breaker panel, do not switch anything on. Call a licensed electrician before you restore power.
- Never loosen the bottom brackets or spring hardware. These parts hold high tension. A slipped wrench can cause serious injury.
- Do not run a door that is off track. The opener can twist panels or snap a cable if you push it.
- Pull the emergency release only when the door is fully closed. If the door is open or partly open, a broken spring can send it down fast.
- Wear gloves, safety glasses, and closed shoes. Dented steel edges and cracked window inserts cut easily.
- Keep generators outside. Carbon monoxide can build up in a garage, even with the door open.
- Work in daylight and bring a helper. A second person can hold a ladder, take photos, and call for help.
If you see a door that is badly bent, hanging by one side, or pulling away from the wall, stop. Keep people and pets clear. Book a technician instead of testing it yourself.
Step 1: Inspect the Outside of the Door
Start outside, a few feet back from the door. Look at it as a whole before you look at any part. Does it sit square in the opening? Do the panels line up? Is the top edge straight?
Take photos from the driveway before you touch anything. These will help later with insurance and repairs.
Door panels
Panels take the most direct hit from wind and flying debris. Walk along the door and check each section.
- Look for dents, creases, and cracks. A crease across the width of a panel usually means the panel has lost strength, even if it looks minor.
- Check the top panel closely. It carries the load from the opener bracket.
- Run your hand along the seams between panels. Open gaps or uneven seams point to bent hinges or struts.
- On wood or composite doors, look for splits and swollen edges.
- On insulated steel doors, check for peeled skin or exposed foam.
A small dent in a single panel may be cosmetic. A crease, a crack, or a bow is structural.
Weather seals and trim
Weather seals keep out rain, insects, and wind-driven debris. They also help the door stay stable in gusts.
- Check the rubber seal along the bottom. Look for tears, flat spots, and sections pulled out of the retainer.
- Look at the vinyl or rubber stops along the sides and top. They should press snugly against the door.
- Inspect the wood trim around the opening. Soft, dark, or swollen wood means water got in.
A seal is cheap to replace. The real concern is what the damaged seal says about the rest of the door. A lifted seal can mean the bottom panel has shifted.
Windows and glass inserts
If your door has windows, check each pane and its frame. Cracks may hide behind the frame. Look for loose gaskets and water stains on the inside. Broken glass is a safety risk and a gateway for rain, so cover it with a board or heavy plastic until it is fixed.
Hinges, struts, handles, and locks
Hinges join the panels. Horizontal struts, the metal bars across the back of each panel, stop the panels from flexing.
- Look for hinges that are bent, cracked, or pulled away from the panel.
- Check that every strut is attached at both ends.
- Test the handle and lock. A lock that no longer lines up can mean the door has shifted.
- Look for missing screws or rivets on the inside face of the door.
Step 2: Check the Tracks, Rollers, and Mounting Points
Tracks guide the door up and over. They must be straight, level, and firmly bolted to the framing. Even a small bend can make the door bind or jump off.
Vertical tracks
Stand inside the garage and sight down each vertical track. Both tracks should look parallel and plumb.
- Look for dents, kinks, and twists.
- Check the gap between the track and the door edge. It should be even from top to bottom.
- Inspect the bolts that fasten the track to the wall. Loose or missing bolts mean the track can shift under load.
- Look at the wood jamb behind the track. Cracks or splintering suggest wind force pulled on the anchors.
Horizontal tracks and ceiling supports
The horizontal tracks hold the door overhead when it is open. They hang from angle iron or steel straps.
- Check that the tracks run level from front to back.
- Look for sagging, bent sections, or loose hanger straps.
- Check the bolts at the curve where the vertical and horizontal sections meet.
Rollers and hinges
Rollers ride inside the track. Look at each one.
- Rollers should sit snug in the track, not wobble or sit crooked.
- Look for flat spots, cracks, or a bent stem.
- Check that no roller has popped out of the track.
If you see a roller out of its track, treat the door as off track. Do not use the opener. A professional garage door off-track repair resets the rollers, checks the track alignment, and tests the door under load. Forcing a door back into place yourself often bends the track more and can damage the cables.
A simple alignment check
With the door closed, look for light around the edges. A thin, even line may be normal. Wide gaps, or gaps that change from top to bottom, mean the door or track has moved. Take a photo of any gap with a tape measure beside it for scale.
Step 3: Look at Springs, Cables, and Drums From a Safe Distance
Springs do the lifting. A typical two-car door weighs a few hundred pounds, and the springs carry most of that weight. That is why this part of the inspection is visual only.
Torsion springs
Torsion springs sit on a metal shaft above the door. Look at them from the floor.
- A visible gap in the coil means the spring has broken.
- Look for stretched coils, rust, or a spring that has shifted on the shaft.
- Check the center bracket for cracks or bending.
- Listen when someone else opens the door by hand. A loud bang during the storm often means a spring broke.
Extension springs
Some doors have extension springs along the horizontal tracks. Look for stretched or sagging springs and check the safety cable that runs through each one. The cable should be intact and attached at both ends.
Lift cables and drums
Lift cables run from the bottom corners of the door up to the drums. They carry the door’s weight.
- Look for frayed strands, kinks, or cables that hang loose.
- Check that each cable sits in its drum groove.
- Look at the drums for cracks or wobble.
- Notice whether one side of the door sits lower than the other. Uneven height often points to a slack or broken cable.
Never touch the bottom bracket or the spring winding cones. They are under tension even when the door is closed. If you see damage, read our guide on how to repair a garage door cable to see what the job involves, and why it calls for a trained technician. A professional broken spring replacement FL also includes matching the new spring to the weight of your door, which keeps the door balanced and the opener from straining.
Step 4: Test the Door by Hand, Then Check the Opener
Only move on to this step if the door sits on its track and the springs and cables look intact. If any part failed the earlier checks, skip the tests and call a technician.
The manual balance test
This test shows whether the springs still carry the door weight.
- Close the door fully.
- Pull the red emergency release cord to disconnect the opener.
- Lift the door by hand, with a helper if needed.
- Stop when the door is about halfway up and let go carefully.
A balanced door stays in place or drifts only slightly. A door that slams down or shoots up has a spring problem. A door that feels heavy, or that scrapes or sticks, may have a bent track. Either result means it needs repair before you use the opener again.
Opener, rail, and wiring
If the door passed the manual test, inspect the opener.
- Look at the motor housing for water stains, rust, or a musty smell.
- Check the rail and chain or belt for bends and slack.
- Inspect the bracket that joins the opener arm to the door. Cracks here are common after heavy wind.
- Look at the wiring for fraying, damp insulation, or loose connectors.
- If the unit has a battery backup, check that the battery is dry and the case is intact.
If the opener took on water, do not plug it in. Moisture inside the motor or logic board can cause a short. Have it checked first.
Safety sensors and auto-reverse
The photo eyes sit a few inches off the floor on both sides of the door. Storm vibration can knock them out of alignment.
- Check that each sensor is firmly mounted and pointing at the other.
- Look for green or steady indicator lights on both units.
- Wipe the lenses to clear dirt or moisture.
Once the door runs smoothly, test the auto-reverse feature. Lay a board flat on the floor in the door’s path and close the door. It should reverse when it touches the board. If it does not, stop using the opener until a technician adjusts it.
Wind-Load Ratings and the Florida Building Code
The inspection tells you what is damaged. The building code tells you what the door should be. Both matter when you decide what to fix.
What a wind-load rating means
A wind-load rating shows how much air pressure a door was tested to resist. It is shown in pounds per square foot. Manufacturers test doors under positive pressure, which pushes in, and negative pressure, which pulls out. Common test standards include ANSI/DASMA 108 and ASTM E330. A higher rating means the door passed at a higher pressure.
The rating belongs to the whole door assembly. That includes the panels, struts, hinges, tracks, brackets, and fasteners tested together. Replacing one part with a mismatched piece can weaken the assembly, so ask the technician to use parts approved for your door model.
What the Florida Building Code requires
The Florida Building Commission maintains the Florida Building Code and runs the statewide product approval system. Garage doors sold for use in Florida wind zones must show they meet the code. In practice, this means the door has a product approval or test report tied to its model.
Some details depend on location.
- High-Velocity Hurricane Zone (HVHZ). Miami-Dade and Broward counties follow stricter rules, including large-missile impact testing.
- Wind-borne debris regions. In some areas, openings such as garage doors must be impact-rated or protected. Your local building department can confirm whether your address falls in one.
- Other areas, including much of Central Florida. The door still has to meet the design wind pressures set for the site, even where impact rules do not apply.
The code language is technical. Your city or county building department can tell you what applies to your address.
Where to find your door’s rating
Look for a label on the inside of the door, often on the bottom panel or along an edge. It may list the manufacturer, model, and wind rating. Take a photo of it. If the label is missing, painted over, or unreadable, the door may predate current rules. That fact will matter when you weigh repair against replacement.
What a hurricane-rated door adds
Hurricane-rated doors are built with heavier gauge steel or reinforced panels, stronger struts, and upgraded hardware. Some are tested for impact from flying debris as well as wind pressure. They cost more up front. In return, they hold the opening more securely when the wind rises, which helps protect the rest of the house.
Repair or Replace: When to Replace a Storm-Damaged Garage Door in Florida
Not every damaged door needs to be replaced. Many need a new spring, one panel, or a fresh seal. The right choice depends on how much is damaged, how old the door is, whether parts are available, and what the door’s wind rating looks like.
The main factors
- Extent of damage. One damaged section is a repair job. Several creased sections, twisted tracks, and a bent frame point toward replacement.
- Age. Many garage doors last somewhere between 15 and 30 years, depending on material, climate, and use. A door near the end of its life may not be worth a major repair.
- Panel availability. Older or discontinued styles can be hard to match. A new panel that does not fit the old design leaves the door uneven.
- Wind rating. An older door without a label may fall short of current expectations. Replacing it gives you a documented rating.
- Repair cost against door value. When the total repair bill approaches the price of a new door, replacement usually gives better value.
Repair or replace at a glance
| Part | Repair usually works when | Replacement usually makes sense when |
|---|---|---|
| Panels | One section is dented and a matching panel is available | Several sections are creased, or the style is discontinued |
| Tracks | A minor bend and the door runs smoothly | Tracks are twisted or the wall brackets pulled from the framing |
| Springs and cables | A single spring or cable broke and the door is otherwise sound | The panels and frame are also damaged |
| Seals and trim | The bottom seal is torn or weatherstripping is loose | The jamb is rotted and must be rebuilt |
| Wind rating | The door is recent and the label shows a rating suited to your area | The door is old or unlabeled, or you want a hurricane-rated upgrade |
| Opener | The unit stayed dry, powers up, and passes the tests | The motor or logic board took on water |
Two common situations
Consider a 12-year-old steel door with a crease in one panel and a bent spot in one track. A matching panel is available. The repair is limited, so a technician replaces the panel, straightens the track, and tunes the door.
Now consider a 22-year-old door with three creased panels, a bent top track, and no wind label. Repair costs would rise quickly. The door also has no documented rating. Replacement is the more practical path.
Planning for a new door
If replacement looks likely, price it before you decide. Size, material, insulation, windows, and wind rating all change the cost. Our garage door installation cost guide breaks down what drives the price. A professional garage door installation in Florida also includes permit handling in most areas, correct anchoring to the framing, and a full safety test at the end.
Ask your technician to confirm in writing that the new door meets local code and to give you the product approval or test documentation. Keep it with your home records and share it with your insurer.
Document the Damage and Choose the Right Help
What you do in the first day or two can affect both your repair and your claim.
Record everything before repairs begin
- Take photos and video of the door from outside and inside. Shoot wide views first, then close-ups of each problem.
- Photograph the rating label and the model number.
- Write down the date and time of the storm, and what you noticed afterward.
- Keep damaged parts until your insurer says you can discard them.
- Make a short written list of the checks you completed and what you saw.
- Protect the opening from more harm. Cover broken glass or gaps with boards or heavy plastic, and keep every receipt.
Talking to your insurer
Wind damage to a garage door is often handled under the windstorm portion of a homeowners policy. Terms vary, so read yours or ask your agent. Many Florida policies use a separate hurricane deductible, often set as a percentage of the dwelling coverage. A small repair may fall below that amount.
Report the damage promptly. Florida claim deadlines have changed in recent years, so confirm the current time limit with your insurer or the Florida Department of Financial Services. Do not wait until the door is fixed to start the conversation.
Hiring a garage door technician
Storms bring out both skilled crews and sellers who are only passing through. A few questions help you tell the difference.
- Ask about licensing and insurance. You can check a contractor license on the Florida Department of Business and Professional Regulation site.
- Request a written estimate. It should list parts, labor, permit fees, and warranty terms.
- Ask for a full system check. A good technician looks at springs, cables, tracks, and the opener, not only the part you can see.
- Ask about product approval. For a new door, request the approval number or test documentation.
- Be careful with large upfront payments and unsolicited door-to-door offers after a storm.
A local company that works in your area also knows how nearby building departments handle permits, which can save time.
Prepare Your Garage Door for the Next Storm
The best inspection is the one that finds a small problem before the wind arrives. A few habits make a real difference.
Before hurricane season
Florida’s hurricane season runs from June 1 to November 30. Early summer is a good time to check the door.
- Run through a routine like our garage door maintenance checklist. It covers hardware, balance, seals, and lubrication.
- Tighten loose bolts on hinges, brackets, and tracks.
- Replace worn bottom seals and cracked weatherstripping.
- Check the label and confirm what wind rating your door carries.
- Photograph the door in good condition. A before and after record helps with claims.
- Ask a technician whether your door can be reinforced with an approved bracing kit, or whether a hurricane-rated door is a better fit.
When a storm is on the way
- Park vehicles inside or in a safe spot, and clear loose items from the driveway.
- Close the door fully. If your door has a slide lock, engage it.
- Unplug the opener or switch off power to it, so it does not try to run during a surge or outage.
- Remove loose objects from the garage that could be pulled toward the opening if the door fails.
Do not leave the door half open to “equalize pressure.” A partly open door is harder to secure, and a damaged panel can fall.
Consider upgrades that pay off
- A hurricane-rated door with a documented wind rating.
- A battery backup for the opener, so you can open the door during a power cut.
- An updated opener with current safety features, such as reliable auto-reverse and sturdy sensors.
Garage Door Storm Damage FAQs
How soon should I inspect my garage door after a storm?
Do it as soon as it is safe to go outside and the area is clear of hazards. Early checks catch problems before rain, humidity, or daily use make them worse. Take photos on the first pass.
Can I use my garage door if it looks fine?
Look first, then test by hand. If the panels, tracks, springs, and cables all look normal and the door moves smoothly, light use is usually fine. If you see a gap, a crooked door, or hear grinding, stop. Using a damaged door can turn a small repair into a larger one.
What are the most common signs of hurricane damage to a garage door?
Bowed or creased panels, bent tracks, a door that hangs crooked, torn seals, and a gap along the top or sides are the most common. Water stains on the opener and loose hardware also show up often.
Is garage door wind damage covered by insurance?
It often is, under the windstorm portion of a homeowners policy, but each policy differs. Hurricane deductibles can be high in Florida, so check your policy. Document the damage and report it early.
How do I know if my door is hurricane-rated?
Look for a label on the door that lists the model and wind rating. Check the paperwork from the installation, or ask your building department for the permit record. A missing label does not prove the door is unrated, but it makes the rating hard to confirm.
Do I need a permit to replace a garage door in Florida?
Most Florida jurisdictions require a permit for a garage door replacement because of wind-load rules. Requirements vary by city and county, so check with your local building department. A professional installer will usually handle this for you.
Can I repair a garage door spring or cable myself?
We advise against it. These parts are under high tension, and mistakes cause serious injuries. Leave spring and cable work to a trained technician
How long does a garage door inspection take?
A homeowner check takes about 30 minutes. A technician’s full inspection, including balance and safety tests, usually takes somewhat longer depending on the door and the damage.
Final Thoughts: Inspect Early, Repair With Care
A good garage door storm damage inspection follows a simple order. Start with safety. Check the panels, seals, and hardware from outside. Move to the tracks, then look at the springs and cables without touching them. Test the door by hand, and only then check the opener and sensors.
Keep your hands off any part under tension. Record everything with photos before repairs begin. Check the rating label and know what the Florida Building Code expects for your area. Then weigh repair against replacement based on the damage, the age of the door, and its wind rating.
A door that looks fine can still be unsafe. When in doubt, have a trained technician look at it.
Need a hand with a storm-damaged door?
Go Pro Garage Door Services helps homeowners across Central Florida with post-storm inspections, repairs, and replacements. Our technicians check the full system, explain what they find in plain terms, and give you a written estimate before work begins. If you live in the area, take a look at our garage door service in Orlando, FL page for what we cover.
Ready to book? Visit Go Pro Garage Door Services to schedule an inspection or request a quote.