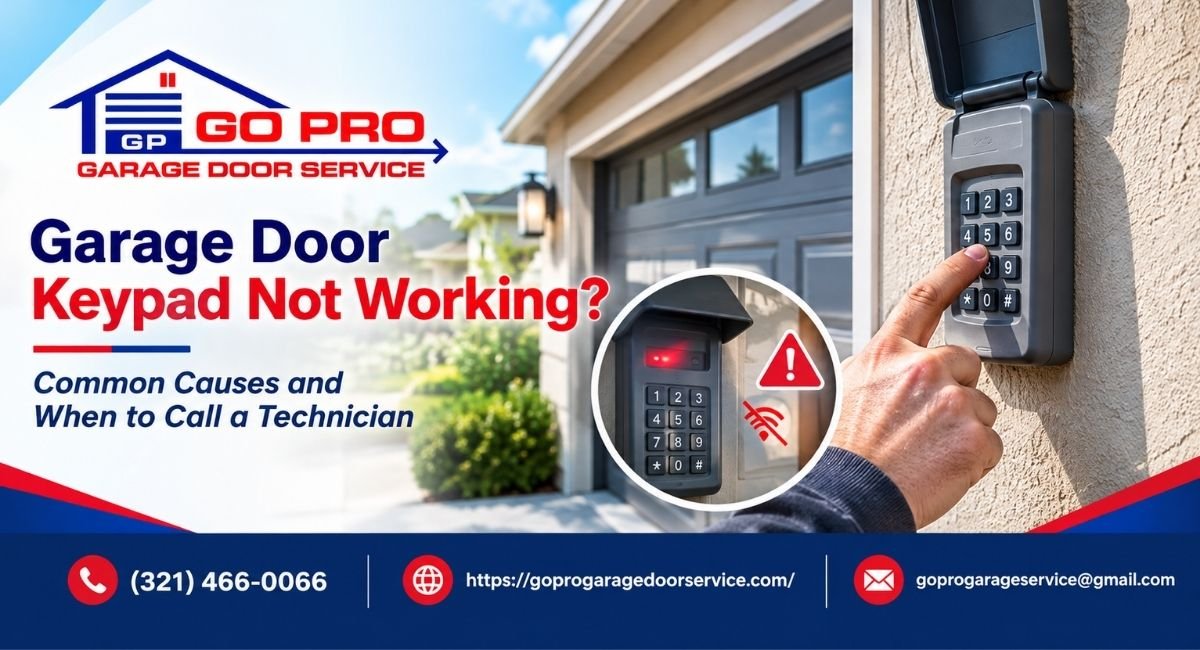
You pull into the driveway after a long day. Rain is starting. Your hands are full of groceries, and you type your PIN into the garage door keypad. Nothing happens. You try again, slower this time. Still nothing.
A garage door keypad that stops working is a common problem, and in most cases the cause is simple. A weak battery, a changed PIN, a wrong opener match, or a lost connection with the opener can all do it. Some of these fixes take two minutes. Others call for a technician and a proper test of the opener receiver.
This guide is organized by symptom. Start with the safe checks that cost nothing. Then follow the path that matches what your keypad does: dead, lit but silent, or unreliable. You will also see how brands like LiftMaster, Chamberlain, and Genie handle pairing, how rolling-code technology protects your home, and when a keypad is worth replacing.
One rule applies throughout. You should never open the opener housing, bridge wires, or bypass the security system to get the door moving. Those shortcuts create shock and security risks. Every step below stays on the safe side of that line.
If you live in Orlando or elsewhere in Central Florida, heat and humidity add a few extra causes. We cover those too.
Start Here: Safe Checks Before Anything Else
Work through these checks in order. They need no tools and carry no risk. Many keypad problems end at step three.
- Test the door another way. Press the wall button or use a remote. If the door moves, the opener works and the keypad is the weak link. If nothing moves, the issue sits with the opener or its power supply.
- Check the power. Make sure the opener is plugged in and the outlet works. Look at the breaker. If the outlet is a GFCI type, press its reset button. Our garage door troubleshooting guide walks through power and sensor checks in more detail.
- Look at the keypad battery. A weak battery is the most common cause of a dead or sluggish keypad. We cover how to swap it correctly in the next section.
- Re-enter your PIN slowly. Press each digit firmly. Then press the Enter or start button if your model has one. Some keypads need that final press within a few seconds.
- Check for a lockout. Several wrong entries in a row can lock some keypads for a short time. Wait a minute, then try again with the right code.
- Look at the wall control. Some wall panels have a lock or vacation mode that blocks remotes and keypads. Check whether yours is switched on, and turn it off if needed.
- Inspect the keypad itself. Look for stuck buttons, cracks, dirt, or water inside the cover.
If the door still does not respond after these seven checks, move to the symptom that fits your keypad best.
Symptom One: The Keypad Is Dead or the Lights Stay Off
A keypad with no lights and no response almost always points to power. Wireless keypads run on a small battery. Wired keypads draw power from the opener or wall wiring.
Replace the battery the right way
Most wireless keypads use either a 9-volt battery or a coin cell such as a CR2032. Check the label inside the cover to be sure. Use a fresh battery from a known brand. Match the plus and minus marks to the diagram in the battery bay.
A few habits help.
- Remove the old battery before you test anything.
- Do not mix a new battery with an old one in models that take two.
- Press a key once the battery is in. The backlight or indicator should respond.
A fresh battery in a keypad that works only for a day or two often means a battery was already weak, or that a part inside is drawing power it should not.
Check the battery contacts
Corrosion looks like a white, green, or blue crust on the metal contacts. It blocks power even when the battery is new. With the battery out, wipe the contacts gently with a cotton swab dipped in isopropyl alcohol. Let it dry fully. Do not scrape the metal with a knife or screwdriver.
Look for moisture and heat damage
Florida weather is hard on outdoor electronics. Rain driven sideways by storms can reach the keypad. Summer sun can heat the case until the plastic warps and the seal fails. Moisture inside the case can corrode the circuit board and short it out.
If you see fogging, water drops, or rust inside the housing, the keypad likely needs replacement. Drying it may bring it back for a while, but corrosion keeps spreading.
When a dead keypad means replacement
If a new battery, clean contacts, and a dry case still give you no lights, the keypad has probably failed. A replacement keypad costs far less than most opener repairs. Make sure the new unit matches your opener brand and generation, which we explain in the compatibility section below.
Symptom Two: The Keypad Lights Up but the Door Does Not Move
This symptom confuses many homeowners. The keypad glows and the buttons beep, so it seems fine. But lights only prove the keypad has power. They do not prove the opener hears it.
The keypad sends a coded radio signal. The opener has a receiver that must accept that code. Any break in that link leaves you with a lit keypad and a closed door.
The most likely causes
- The keypad lost its pairing. This happens after a power surge, a code reset on the opener, or a new opener install.
- The PIN was changed or entered wrongly. A keypad that accepts the digits but sends nothing may have no code stored.
- The keypad is not compatible. A keypad made for a different brand or an older opener generation will light up but never connect.
- The opener is in lock mode. The wall control may be blocking all wireless signals.
- The opener has a mechanical or sensor issue. If the opener light flashes or the motor hums without moving the door, the problem lies in the door system, not the keypad.
A short test that narrows it down
Try your remote controls. If they open the door, the receiver works and the keypad is likely unpaired or faulty. If every remote and the keypad fail while the wall button works, the receiver or antenna may be the problem. If the wall button fails too, look at power, sensors, and the door itself.
Also watch the opener when you press the keypad. Does the light blink? Do you hear a click? Does the motor try to run? Each response gives a clue. A click or a quick light flash often means the opener received the signal and something else stopped the door.
What to do next
If the opener and wall button work, reprogram the keypad using the steps in the reset section below. If reprogramming fails, the keypad or the receiver needs a closer look. A professional can test each separately, which saves you from buying the wrong part. Our guide on how to fix a garage door opener explains the wider range of opener faults and how to tell them apart.
Symptom Three: It Works Only Up Close or Only Some of the Time
An unreliable keypad is harder to diagnose than a dead one. The cause often hides in the radio signal path, the battery, or the environment.
A weak battery shortens range
A battery near the end of its life may still light the keypad. It may not have enough power to send a strong signal. The keypad then works if you stand next to the garage, and fails from the street. Replace the battery first. It costs little and rules out the most common cause.
Check the opener antenna
The opener receives signals through a thin antenna wire that hangs from the motor unit. It should hang straight down and stay clear of metal. Do not cut it, coil it, or tape it to a bracket. A bent or blocked antenna cuts the receiving range. Straighten it gently if it has kinked, and move any metal shelving or loose items away from it.
Watch for radio interference
Garage door systems use radio frequencies that other devices can disturb. Common culprits include:
- Some LED light bulbs, especially cheap ones in the opener light socket
- Nearby wireless equipment, power supplies, and chargers
- Large metal objects between the keypad and the opener
A simple test: swap an LED bulb for a plain incandescent or a bulb labeled as garage door opener compatible. Then try the keypad again. Many people see their range improve right away.
Heat, humidity, and sun in Florida
Central Florida stresses keypads in specific ways.
- Heat shortens battery life and can warp plastic cases.
- Humidity speeds up corrosion on contacts and circuit boards.
- Direct sun can fade the buttons and make keys stick.
- Heavy rain can get behind loose covers or damaged seals.
If your keypad faces west or south and gets full sun, you may notice battery changes more often. A shaded mount or a weather-rated model can help.
A real-world pattern
Imagine a homeowner in Winter Park whose keypad works fine in the morning and fails by late afternoon. The case is hot to the touch, the battery is two years old, and the keypad sits in direct sun. Replacing the battery gives only a short fix. A newer keypad with a better seal, mounted on a shaded wall, solves it for good. Patterns like this are why timing and temperature matter when you diagnose an unreliable keypad.
Symptom Four: It Stopped After a Battery Change or Power Outage
Timing gives you strong hints. If the keypad worked until a specific event, start with that event.
After you changed the battery
This one frustrates people. You put in a new battery and the keypad still does nothing. Here are the usual reasons.
- The battery sits backward. Check the plus and minus marks again.
- The battery is the wrong type. A coin cell in a 9-volt keypad, or the reverse, will not work.
- The new battery is weak. Packs that sat in a hot garage or a warm store shelf can arrive partly drained.
- The contacts are dirty or bent. A loose contact breaks the circuit.
- The keypad lost its stored code. On some models, a fully drained battery can wipe the pairing. You then need to reprogram it.
Try a second, fresh battery from a sealed pack before you assume the keypad has failed.
After a power outage or storm
Florida storms bring outages and surges. When power returns, the opener usually restarts without trouble. A surge can also damage the opener’s circuit board, including the radio receiver. In that case the wall button may still work while remotes and keypads do not.
Try a simple reset first. Unplug the opener for about 30 seconds. Plug it back in. Then try the keypad again. If the keypad is still silent and the other remotes fail too, the receiver may have taken damage. That needs a professional diagnosis. Do not open the motor housing yourself.
Symptom guide at a glance
| What you notice | Likely cause | Safe next step | Call a technician if |
|---|---|---|---|
| No lights at all | Dead battery, corroded contacts, or failed keypad | Install a fresh battery and clean contacts | A new battery still gives no lights |
| Lights on, door does not move | Lost pairing, wrong keypad type, or lock mode | Check lock mode, then reprogram | Remotes and keypad both fail, or reprogramming will not hold |
| Works only up close | Weak battery, bent antenna, or interference | Replace battery, check antenna, swap LED bulbs | Range stays short after those steps |
| Fails after a battery change | Backward or wrong battery, or lost code | Check battery type and polarity, then reprogram | The keypad stays dead |
| Fails after a storm or surge | Receiver or circuit board damage | Reset power and test remotes | Remotes fail and the wall button works |
| Door starts and reverses | Sensor, travel limit, or door issue | Check sensor alignment and obstructions | Reversing continues after a clear path |
A door that starts to move and then reverses is rarely a keypad fault. The keypad did its job. The safety system or door balance stopped the door, so check the door first.
Brands, Compatibility, and Rolling-Code Technology
Many failed keypad purchases come down to one mistake: buying a keypad that does not match the opener. Radio systems differ by brand, by year, and by frequency. Matching them takes a few minutes and saves a return trip.
How rolling-code technology works
Most modern openers use rolling-code technology. Each time you press a button or enter a PIN, the keypad sends a new, one-time code. The opener’s receiver expects the next code in a shared sequence. A code that was used once cannot open the door again.
This protects you from thieves who try to capture and replay a signal. It also explains why pairing matters. The keypad and the receiver must stay in step. If they drift out of sync or lose their link, the opener ignores the keypad even when the keypad looks perfectly healthy.
LiftMaster and Chamberlain
LiftMaster and Chamberlain are both brands of The Chamberlain Group, and their openers share similar systems. Many of their models use Security+ or Security+ 2.0 technology. The color of the Learn button on the opener often tells you which generation you have. Yellow is commonly linked to Security+ 2.0, while purple, red, orange, and green point to older systems. Check the opener’s manual or label to confirm, since the details vary by year.
A keypad built for one generation may not work with another. Always check the box or the maker’s compatibility chart against your opener’s model number.
Genie
Genie openers use their own rolling-code system, often sold as Intellicode. Genie keypads are designed to pair with a matching generation of opener. Some universal keypads claim support for several brands, but you should check the exact opener model on the compatibility list before you buy.
How to confirm compatibility
- Find the opener’s model number on the label on the motor unit.
- Note the color of the Learn button and the location of the antenna.
- Read the manufacturer’s compatibility list, or take a photo of the label to the store.
- Confirm whether you need a wireless keypad, which runs on a battery, or a wired one, which connects by wiring to the opener.
- Check the return policy in case the unit does not pair.
If you plan to upgrade the opener along with the keypad, see our overview of smart garage doors guide. It explains how app-based access and modern openers fit together, and where a keypad still has a role.
How to Reset and Reprogram a Garage Door Keypad
Reprogramming pairs the keypad with the opener again and sets a new PIN. Exact steps differ by brand and model, so keep your manual or the maker’s online guide close. The steps below show the general pattern used by many LiftMaster and Chamberlain style openers.
Before you start
- Put a fresh battery in the keypad.
- Choose a PIN you will remember. Avoid birth years, street numbers, and simple runs like 1234.
- Check that the door path is clear, because the door may move during testing.
- Use a sturdy step ladder to reach the opener, and ask someone to steady it.
General pairing steps
- Locate the Learn button on the opener’s motor unit. It sits near the antenna wire, often behind a light cover.
- Press and release the Learn button once. An indicator light glows or blinks. You usually have about 30 seconds to continue.
- Go to the keypad and enter your chosen PIN.
- Press the Enter button, or the button your model uses to confirm.
- Watch the opener. The light often blinks or you hear a click when it accepts the code.
- Enter the PIN again and press Enter. The door should move.
Touch only the Learn button. Do not remove covers or touch other parts of the motor unit.
Changing the PIN on the keypad
Many keypads let you set a new PIN from the keypad itself. The key sequence varies, so follow your model’s instructions. Then pair the new PIN with the opener if the manual says it is needed.
A warning about clearing all codes
Holding the Learn button for several seconds usually erases every remote and keypad stored in the opener. Use this reset only when you plan to reprogram everything. It can make sense after a lost remote, a move into a new home, or a security concern. If you do it, reprogram each device right away.
If pairing fails
- The 30-second window may have run out. Try again and move quickly.
- The keypad may not match the opener generation.
- The battery may be weak or inserted wrong.
- The opener’s memory may be full on some older models.
- The receiver may be damaged.
Two failed attempts with a fresh battery suggest the problem is a mismatch or a hardware fault. That is the right time to stop and call a technician.
When the Opener Receiver Needs a Professional Diagnosis
The receiver is the radio circuit inside the opener. It listens for signals from your keypad and remotes. When it fails, nothing wireless works, even if every keypad and remote is healthy.
Signs the receiver may be the problem
- Every remote and the keypad fail, while the wall button still works.
- The keypad pairs, then forgets within hours or days.
- Range stays very short after you fix the antenna and replace batteries.
- Trouble started after a lightning strike, surge, or flooding.
- The opener light blinks in a pattern that the manual links to a radio or board fault.
One of these signs on its own does not prove the receiver is bad. A technician can test each part and tell you for certain.
What a technician checks
A trained technician tests the keypad and each remote one by one. They check the antenna, power supply, and Learn button function. They compare the opener model against the keypad type. They look at the circuit board for damage that shows. Then they tell you whether the fix is a new keypad, a receiver repair, a board replacement, or a new opener. You get a clearer cost picture before you spend money.
What not to do
Some shortcuts look tempting when you are locked out of your own garage. Skip all of them.
- Do not open the motor housing. The unit holds electrical parts that can shock you even when it is unplugged.
- Do not bridge wires at the wall control terminals to force the door open.
- Do not disable or bypass the safety sensors. They stop the door from closing on people, pets, and cars.
- Do not use signal boosters or code-grabbing tools. They weaken the security that rolling code provides.
- Do not buy cheap, unmatched receivers from unknown sellers.
If you are locked out, enter the house through another door. If your garage door has an outside emergency release, use it as the maker instructs. From inside, pull the red release cord only when the door is fully closed, then lift it by hand.
When to call right away
Call a technician if the door reverses after you clear the path, if you smell burning, or if the opener hums without moving the door. Call too if you cannot locate the model number or if the problem keeps coming back. A professional garage door tune-up also gives a technician the chance to test your keypad, remotes, and safety reverse in one visit, before a small fault becomes a lockout.
Keypad Repair or Replacement: How to Decide
A keypad is a small part, but the choice around it can be bigger than it looks. Sometimes a battery and a reset finish the job. Other times a new keypad or even a new opener makes more sense.
Compare your options
| Option | Works best when | Watch for |
|---|---|---|
| Fresh battery and reprogramming | The keypad has no damage and the opener receives other remotes | A repeat failure within days suggests a hardware fault |
| New wireless keypad | The case is cracked, corroded, or the buttons stick | Brand and generation must match the opener |
| Wired keypad | You want to avoid batteries and the wiring route is simple | Wiring work should follow the maker’s instructions or be left to a pro |
| Receiver or circuit board repair | All wireless devices fail and the wall button works | Repair cost against the age of the opener |
| New opener | The opener is old, fails often, or lacks modern safety features | Door balance and sensors should be checked at the same time |
Wireless or wired keypad
Wireless keypads are the most common. They mount in minutes, need no new wires, and pair through the Learn button. Their weak point is the battery, which needs a change every so often.
Wired keypads connect by cable to the opener or wall control terminals. They avoid battery changes. Running the wire takes more effort, and mistakes can cause shorts or damage the opener. If you choose this route, follow the maker’s manual closely or ask a technician to install it.
When the opener is the real issue
A new keypad cannot fix an opener that is worn out. Consider replacement if the opener is more than 10 to 15 years old, if repairs keep piling up, or if the unit lacks modern safety features. Openers made before 1993 may not include the photo-eye sensors that current safety rules require. A new opener also brings stronger rolling-code protection and support for app-based access.
Before you commit, weigh the total picture: opener condition, door balance, springs, and tracks. A professional garage door installation lets a technician match the new opener to the door and test the safety reverse on the spot.
Keypad Security and Preventing Repeat Problems
A working keypad is also a security tool. A few habits keep it reliable and keep your garage safe.
Protect your PIN
- Change the PIN when a contractor, house sitter, or former tenant no longer needs access.
- Pick a code that is not tied to your address, phone number, or birth date.
- Shield the keypad with your hand when you type.
- Wipe the keypad now and then. Worn buttons can show which digits you use most.
- Never write the PIN on a sticky note near the door.
Keep records
Write down the opener’s brand, model number, and the Learn button color. Store the note somewhere safe. When you need a new keypad, you will not have to climb a ladder to look it up. If you reset all codes, the list also reminds you which devices need pairing again.
Maintain the keypad
A small routine prevents most failures.
- Replace the battery about once a year, or sooner if the keypad becomes slow. Many Florida homeowners time this before hurricane season starts on June 1.
- Keep a spare battery in a dry place in the house.
- Test the keypad once a month. A quick test takes ten seconds.
- Wipe the cover with a damp cloth. Skip harsh sprays that can seep into the case.
- Check that the cover seals closed and that no cracks let in water.
- Test it after storms and power outages.
The keypad is one part of a larger system. Our garage door maintenance checklist covers the springs, tracks, sensors, and opener, so one routine protects the whole door.
Garage Door Keypad FAQ
Why is my garage door keypad not responding?
The most common causes are a weak battery, a lost pairing with the opener, a keypad that does not match the opener, and radio interference. Start with a fresh battery and a check of the wall control lock mode. If those do not help, reprogram the keypad.
Why is my garage door keypad not working after a battery change?
Check the battery type and the plus and minus direction. Clean the contacts. Try a second battery from a sealed pack. Some keypads lose their stored code when the battery drains fully, so you may need to pair the keypad with the opener again.
How do I reset a garage door keypad?
Place a fresh battery in the keypad. Press the Learn button on the opener. Then enter your PIN on the keypad and press Enter within the time window, usually about 30 seconds. Steps vary by brand, so check your manual. Avoid clearing all codes from the opener unless you plan to reprogram every device.
How long do wireless keypad batteries last?
Life depends on the keypad model, the battery type, how often you use it, and the temperature. Many last a year or more. Heat can shorten that span, so Florida owners often replace batteries on a yearly schedule.
Will any wireless garage door keypad work with my opener?
No. The keypad must match the opener’s radio system and rolling-code generation. Check the opener’s model number and the keypad’s compatibility list before you buy. Universal models exist, but you still need to confirm support for your exact opener.
Can I fix the keypad myself, or do I need a technician?
You can safely replace the battery, clean the contacts, and reprogram the keypad. You should not open the opener housing, bridge wires, or bypass safety sensors. Call a technician if all wireless devices fail, if the door reverses, or if pairing fails after fresh batteries.
Is a keypad that works only sometimes a sign of a bigger problem?
Not always. Weak batteries, a bent antenna, and interference from LED bulbs are common causes. If you fix those and the problem returns, the keypad or the receiver may be failing, and a professional test will tell you which.
Does a power outage affect the keypad?
A power outage itself usually does not erase the pairing. A power surge can damage the opener’s receiver, though. If the keypad and remotes fail after a storm while the wall button works, have the opener checked.
Final Thoughts: Start Simple, Call When the Signs Point Deeper
A garage door keypad that stops working is annoying, but the path to a fix is clear. Test the door with the wall button first. Replace the battery and check the contacts. Make sure the keypad matches your opener. Reprogram it if the pairing was lost. These steps solve most cases without any tools.
When every wireless device fails, when the door reverses, or when pairing keeps failing, the problem has moved beyond the keypad. Do not open the opener or bypass safety features. Let a trained technician test the receiver, antenna, and sensors, then decide on the right repair.
Need help with a keypad or opener problem?
Go Pro Garage Door Services helps homeowners across Orlando and Central Florida with opener diagnosis, keypad pairing, repairs, and replacements. A technician can test your keypad, check the receiver, and tell you plainly whether you need a battery, a new keypad, or a new opener.
Ready to get it sorted? Visit our garage door services page to book a visit or request a quote.
Helpful resources
- LiftMaster: manuals, compatibility charts, and keypad programming guides.
- Chamberlain Group: product support and opener documentation.
- Genie: manuals and keypad information for Genie openers.
- Door and Access Systems Manufacturers Association (DASMA): industry standards and garage door safety information.
- U.S. Consumer Product Safety Commission: safety guidance and recall notices for garage door openers.